This is a follow up of the post I’ve shared earlier to create files earlier at https://sp2hari.com/mail-merge-to-pdf-files/
While the first version of the post I made for creating multiple PDF files from Google Doc and Google Sheets still works, it is a lot hackerish. Copying the ID from the document, and managing the ‘Config’ in the sheet is a lot of work. One can easily make a lot of mistakes while copy-pasting. Also, the user (I have only one so far) I had testing this script was very reluctant to run the script because of the overhead involved in managing these difficult document id and folder id. I realized I had to make the process much easier for someone to run the script. Hence the v2 with the settings option.
Step 1: Create a new Google Sheet
Open the sheet https://docs.google.com/spreadsheets/d/1ltQ0eQcmK_pztv0Bb8diJIzIr3YSMGU3soF-i6Bcmo4/edit?usp=sharing and create a copy of the sheet using ‘File -> Make a copy’ option.
Step 2: Create the template Google Doc
Open the document https://docs.google.com/document/d/1yAk0C5I-ycHxMB8jA3Anpu8LNLLKzxtu8N6PM5FG8H8/edit?usp=sharing and create a copy of the doc using ‘File -> Make a copy’ option. Copy the entire URL of this Google Document. We will need this later (to be used as ‘Template Link’)
Step 3: Create the output Google folder
Create a new empty folder in your Google Drive. This will be the folder where we generate the files. Copy the URL of this folder as well. We will need this later too (to be used as ‘Output Folder’)
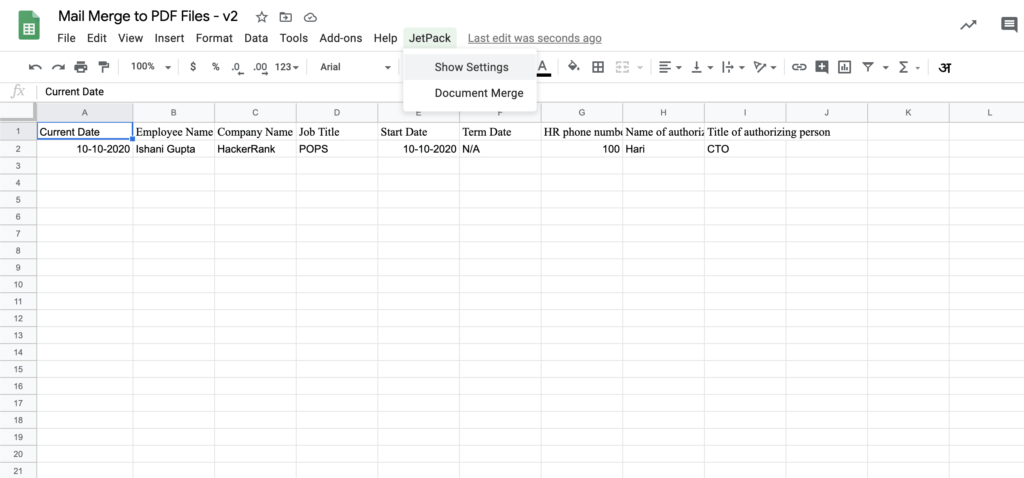
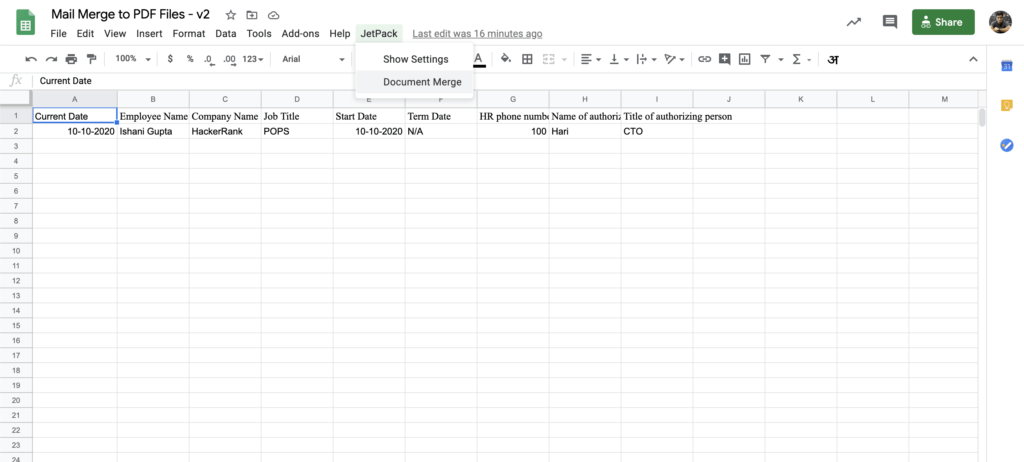
Step 4: Create Google Apps Script
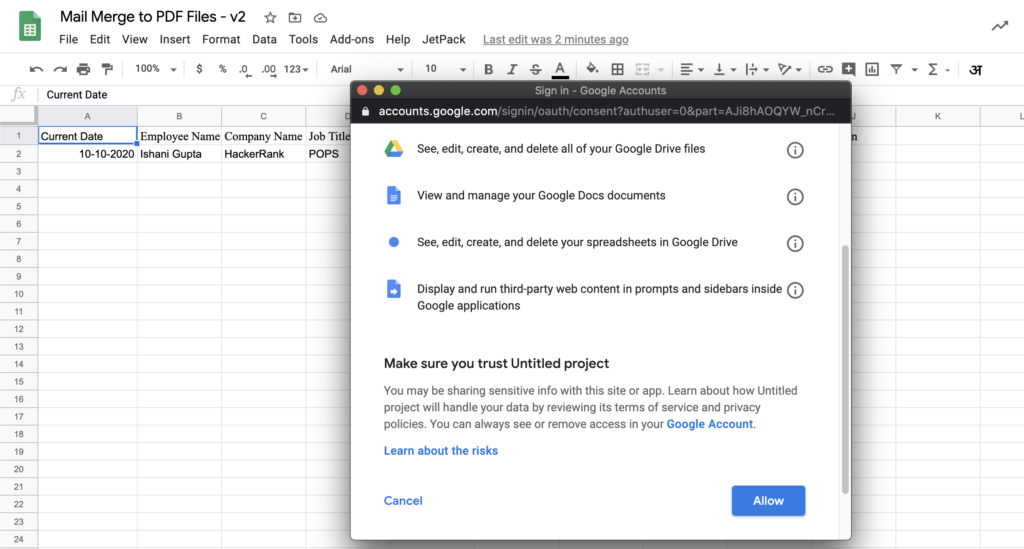
When you make a copy of the Google Sheets file, it automatically clones the script along with it. So you can avoid this step if you cloned the Google Sheet in Step 1. If you want to find the code powering this script, you can find it by following the option ‘Tools -> Script Editor’. The latest version of the code will be also be maintained at https://gist.github.com/sp2hari/75334431913719f204030753da4eef2d.
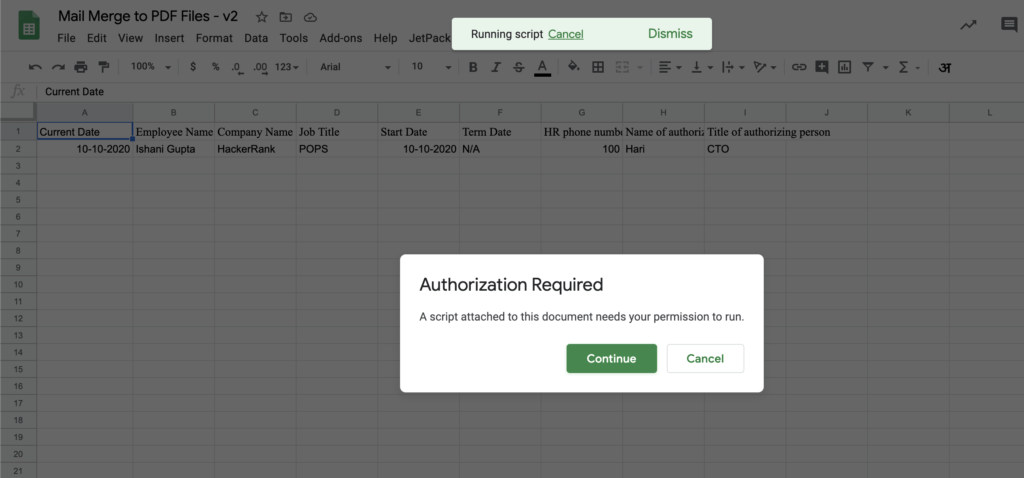
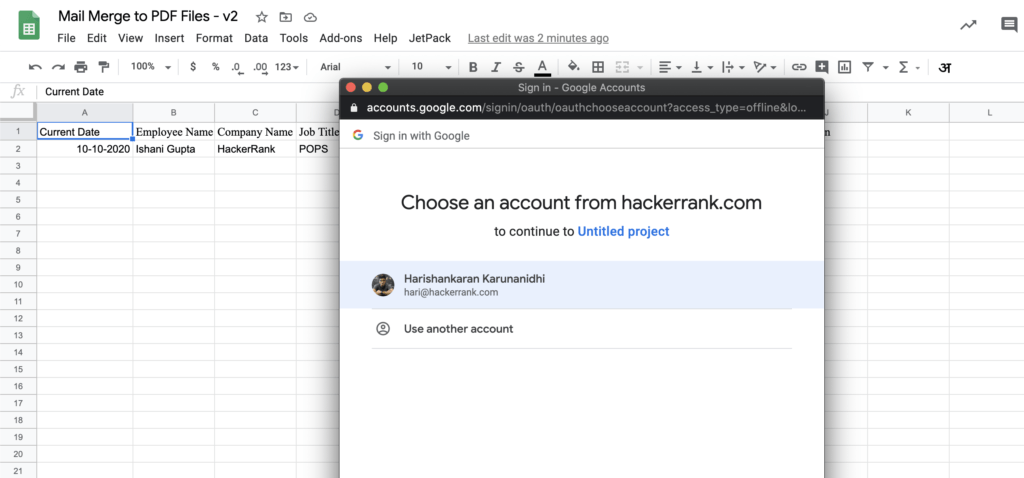
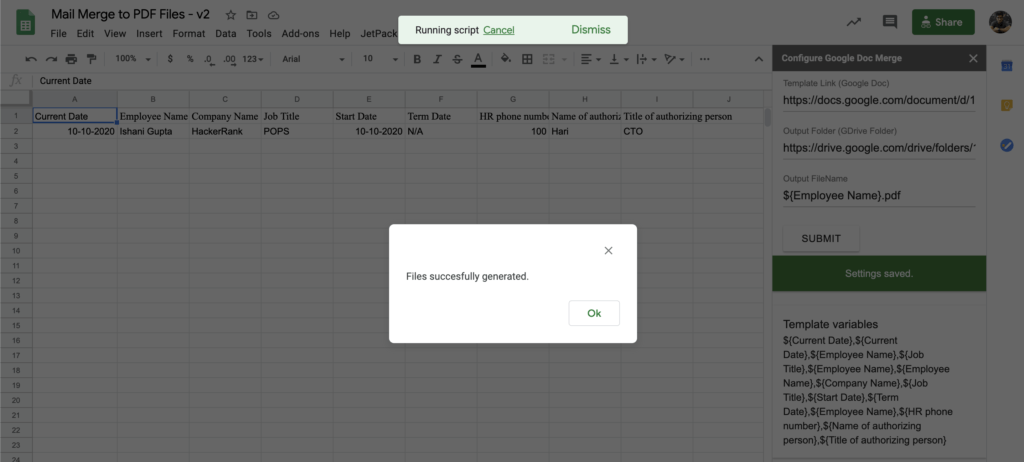
Step 5: Run the script
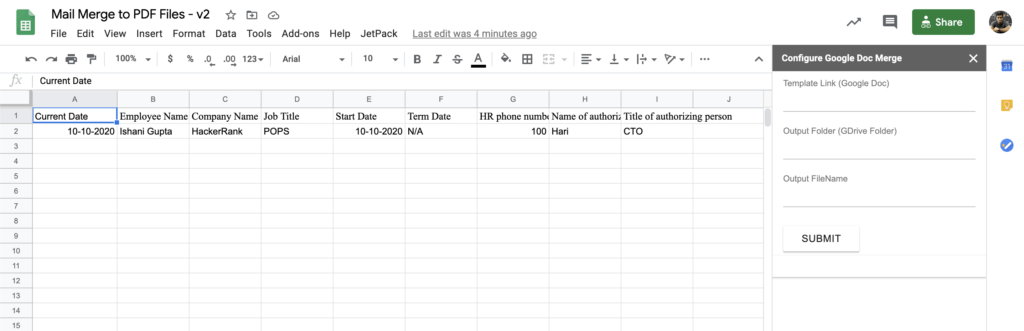
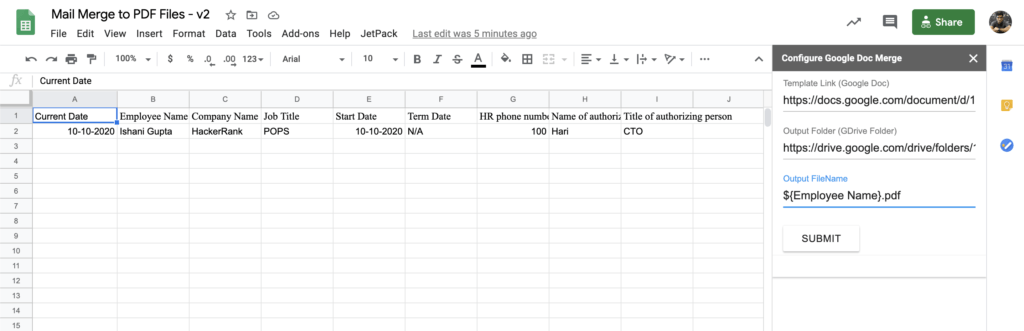
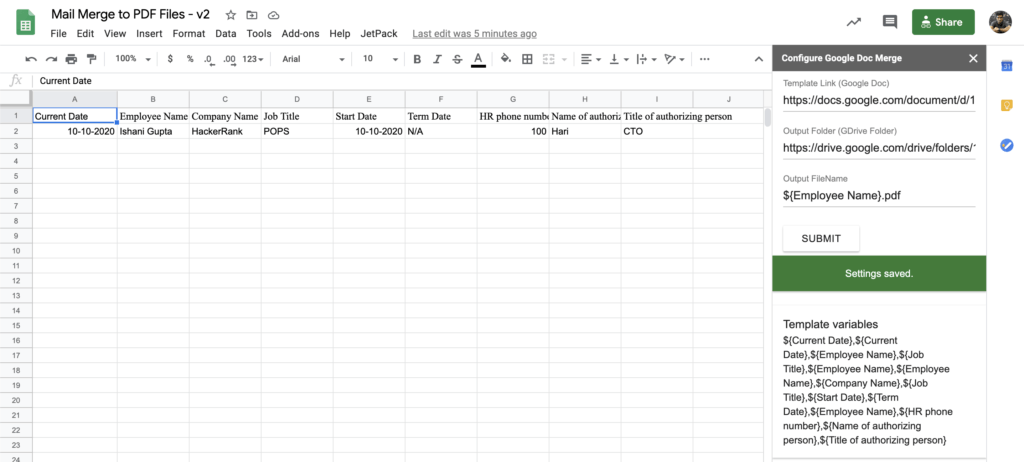
There is one interesting image on how to build an MVP that comes back to my mind looking at the v1 and v2 post. The earlier version had the hackish ‘Config’ sheet with which you had to manage the settings. It still works, but not easy to work with. You had to do a lot of hard work to make it happen. The v2 has this much better looking ‘Settings’ option to manage the Config details. It makes the job easier and has a bunch of error handling added to the settings page. Looking forward to the v3, v4, and v5.