
I follow Inbox Zero to take control of my inbox. Initially, it was great and ‘felt’ very productive. But later at some point, it became an addiction to check email very often. The urge to keep the email at zero made me check inbox regularly. After a few weeks, I wasn’t sure if I was even doing my job. I was responding to my email fast, getting the inbox clean, but that isn’t the only part of my job. I had to find the fine balance between Inbox Zero vs doing something really productive.
Then I started using the Boomerang Chrome extension especially for the ‘Inbox Pause’ feature. While Boomerang is great and is absolutely necessary for anyone trying to manage their email better, I wasn’t so happy to pay for a single feature. Especially, this was a free earlier under a different chrome extension. Also, I didn’t want to install one more extension and bloat my Google Chrome. Finally, I realized I can achieve the same using Google Scripts.
This blog post is a 4 step process to implement Inbox Pause in Gmail. No need to install any extensions or share data with any other third party.
Step 1: Create a Label
Create a new label in Gmail called “Inbox-Paused”. Make sure the label name is exactly the same and it is case sensitive (you will know why when you look at the code).
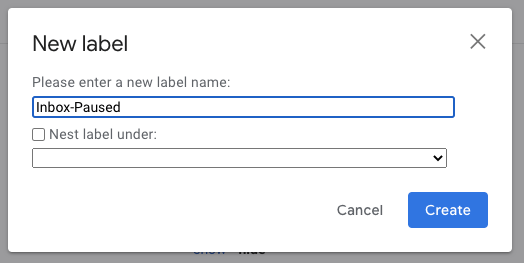
To make sure one you don’t see “Inbox-Paused” in the label list (to reduce the urge to check email often), make sure ‘Show in label list’ and ‘Show in message list’ are both marked as hide. If you prefer, you can keep this as ‘show’ for the initial few weeks and then change it to ‘hide’.

Step 2: Setup the Project with code
Head to https://script.google.com/ and click on the ‘New Project’ button in the top left. Paste the following code in the code editor and save the file. When you save the file for the first time, give a project name (anything you prefer). If you have multiple Google accounts, make sure you create the project with the same Google account where you created the label.
function unPause() {

  //Get the label with the Name "Inbox-Paused"
  var pausedLabel = GmailApp.getUserLabelByName("Inbox-Paused");

  if (pausedLabel) {
    //Get all the threads under the label
    var threads = pausedLabel.getThreads();

    //Loop through all the threads
    for (var i = 0; i < threads.length; i++) {

      //Move the thread to Inbox
      threads[i].moveToInbox();

      //Remove the label "Inbox-Paused" from the current thread
      pausedLabel.removeFromThread(threads[i]);
    }
  }
}
The code is just few lines and well commented. All it does is move the emails (aka threads) from the label ‘Inbox-Paused’ to Inbox.

Step 3: Create the trigger
Click on Edit -> Current project’s trigger to view all the triggers. For the first time, you won’t see any triggers there. It is time to create a new trigger. Click on the ‘Add Trigger’ on the bottom right to create a new trigger.
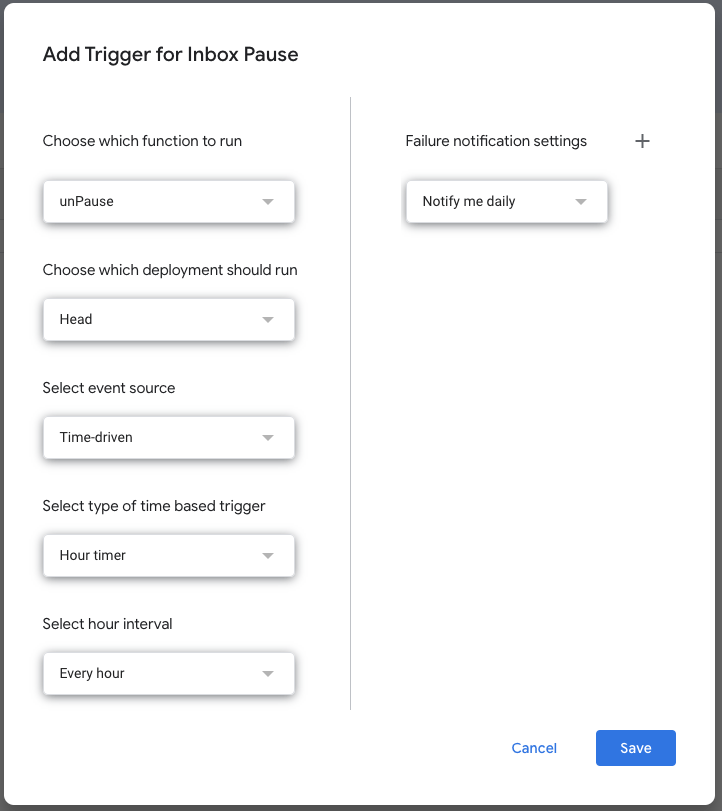
Most of the default options should work as it. If needed, you can change the ‘Select hour interval’ to something else instead of every hour. In fact, if this is time first time you are setting up this script, I would recommend ‘Every hour’ since anything beyond that increases the anxiety of missing out on the emails.
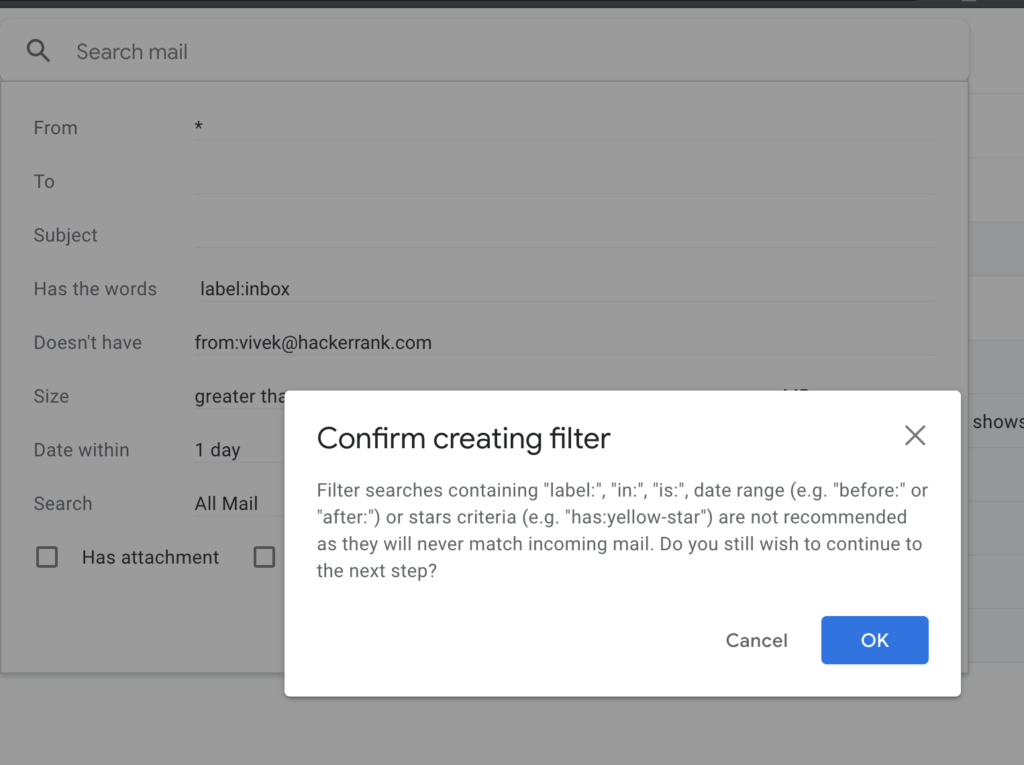
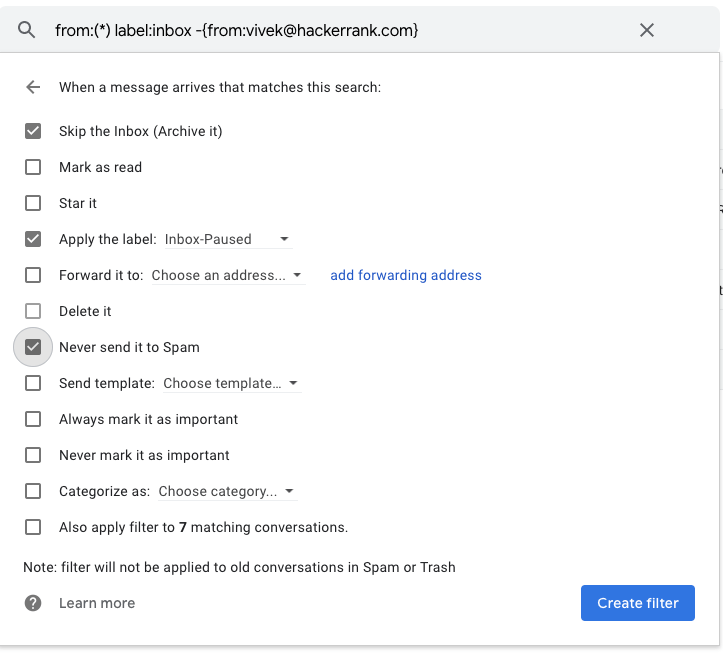
Step 4: Send all Emails to Inbox-Paused Label
Create a filter, which chooses all the emails. The From “*” and Has the words with “label:inbox” are the only two things needed. If you want some emails to reach your inbox directly without any pause, you can use the option “Doesn’t have”

This has been working well for the last 6 months and helped me get a lot productive. Now, there is no anxiety to check email every few minutes and I am also able to keep the inbox at zero.
Pingback: Productive Zoom Meetings – hari@weblog